


Cool Moves for Cooking With Milk Products
There are a number of techniques that you can use to work milk products into your cooking, and improve your daily dishes.
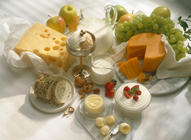
Dairy products have always occupied a special place in the kitchen. Their variety and diverse characteristics make them ingredients of choice for any cook. But, like many other ingredients, cooking with dairy gives better results when proper cooking and baking techniques are applied. Here's a quick reminder of some of those techniques.How to thaw frozen butter
How to soften hard butter
How to melt butter
How to measure butter
How to clarify butter
How to sauté or pan-fry with butter
How to cream butter
How to "cut" butter into dry ingredients
How to "rub" butter into dry ingredients
How to heat milk
How to shred cheese
How to whip cream
How to thaw frozen butter
Thaw frozen butter for 6 to 7 hours in the refrigerator or 3 to 4 hours at room temperature.Note: Thawing butter in the oven or microwave is not recommended unless your recipe calls for melted butter. Refreezing thawed butter is not a good idea as it will diminish its flavour.
How to soften hard butter
Each of the methods below works well. Use the one that best suits you.
On the counter:
- Cut a large block or the measured piece of chilled butter into smaller squares and leave on the counter for about 30 minutes.
- Place butter, cut into smaller pieces, over a bowl of hot, not boiling, water.
- Beat butter with an electric mixer in a large bowl until it softens (then add remaining ingredients if baking).
- Place butter between two sheets of waxed paper or parchment paper and shape it with the palm of your hand, or roll it with a rolling pin until it reaches the texture you want.
In the microwave:
- Cut the butter into small pieces and spread out on a microwave-safe plate or bowl. Loosely cover the bowl with a paper towel. Use Medium-Low (30%) power for a few seconds – watching it closely. Stop the microwave and check the butter every 5 to 10 seconds to make sure it isn’t melting.
Note: If you accidentally melt your butter, don’t use it for baking as you won’t get the desired texture. Instead, use it for something else like sautéing or drizzling over cooked vegetables.
How to melt butter
- Butter should never be melted on high heat. High heat causes the milk solids to separate out and can burn the butter.
- Melt butter on the stove-top in a heavy saucepan or the top of a double boiler over medium-low or medium heat. Watch butter carefully when melting and remove it from the heat when it’s about three-quarters melted, then stir until it’s completely melted.
- In the microwave, cut butter into small pieces and loosely cover the bowl with paper towel. Melt on Medium-Low (30%) power or Defrost, checking every 10 to 15 seconds until it’s almost melted but a few small solid pieces remain. Remove from the microwave and stir until it’s completely melted.
How to measure butter
In Canadian recipes, butter is often measured by volume, not by weight. In the United States, it’s often measured in sticks, and in European and British recipes, by weight.Here are the equivalents of some common weights and volumes:
| Butter by volume | Butter by weight | Butter sticks |
|---|---|---|
| 2 cups / 500 mL | 1 lb (16 oz) / 454 g | 4 |
| 1 cup / 250 mL | 1/2 lb (8 oz) / 227 g | 2 |
| 1/2 cup /125 mL | 1/4 lb (4 oz) / 115 g | 1 |
For more tips on how to measure butter, check out our Butter Tips & Tricks section.
How to clarify butter
Clarified butter is butter which has had its water and milk solids removed. Once clarified, butter can resist higher cooking temperatures, making it better for pan-frying than whole butter. It is also used as a base for various sauces.
- In a shallow saucepan or a skillet, melt the butter over low heat until it liquefies. As it heats up, carefully skim off the froth that floats to the top with a spoon, and discard.
- Once the top layer is a clear yellow colour (this is the clarified butter) and the solids have sunk to the bottom, carefully pour the clarified layer through a cheesecloth-lined sieve into a clean jar or container – leaving the solids in the pan. You may need to use a small spoon to carefully spoon off the last of the clarified butter.
- Use the clarified butter immediately or let it cool, cover tightly and refrigerate it for up to 3 weeks. Simply re-melt to use. The solids can be added to sauces, mashed potatoes, or soups to add some richness. Be sure to refrigerate any extra solids and use within 1 week.
How to sauté or pan-fry with butter
Regular whole butter has a low smoking and burning point. For that reason, pan-frying and sautéing should be done over moderate, never high, heat.
- For the best results in sautéing and pan-frying, heat the pan first, then add the butter; swirl to quickly coat the pan, then add the food to be sautéed or fried.
- If you want to sauté or pan-fry with butter over high heat, especially for meats or crisped herbs or vegetables, used clarified butter or add canola oil to the butter in the pan, using a ratio of 1/3 oil to 2/3 butter.
How to cream butter
Many recipes for baked goods instruct to “cream” the butter. This helps incorporate air into the butter, giving a light and tender texture.
- Measure the amount of butter you need and soften it just enough that your finger easily leaves an impression in the butter when you press it.
- Place the butter in a large bowl and use a wooden spoon or an electric mixer to stir or beat the butter until it is smooth, creamy and a uniform texture.
- Add the sugar or other ingredients called for in the recipe to further cream them together.
How to "cut" butter into dry ingredients
Pie crusts, pastries, scones and biscuit dough generally use this technique. Measure cold butter, cut it into small cubes (about the size of your little finger tip or according to the recipe directions) and return it to the fridge for at least 15 minutes to make sure it is well chilled. Chill the bowl you’ll use for mixing, too. Combine the dry ingredients in the chilled bowl then sprinkle the cubes of butter over top. Use a pastry blender (also called a pastry cutter) with an up and down motion or two dinner knives with one in each hand, cutting in opposite directions, repeating until the butter is in tiny pieces or until the butter and flour mixture clumps together in tiny pieces and the mixture resembles coarse meal (some recipes will call for fine meal or for the butter to only be cut into small pieces). Using cold butter and coating the dry ingredients in this way creates flaky layers in the pastry or dough.
How to "rub" butter into dry ingredients
Measure cold butter, cut it into small cubes (about the size of your little finger tip or according to the recipe directions) and return it to the fridge for at least 15 minutes to make sure it is well chilled. Chill the bowl you’ll use for mixing, too. Combine the dry ingredients in the chilled bowl. Rub the cubes of cold butter through a coarsely textured sieve letting them fall on top of the dry ingredients. Then use a fork to quickly combine the butter and flour mixture.
- Some recipes will specify to use your fingers to rub in the butter. Use just your finger-tips (not your warm hands) and quick motions, pinching your fingers to mash the small pieces of butter into the dry ingredients until moist crumbs form. This is often used for streusel or crumble toppings.
How to heat milk
Milk should be heated gently and slowly. Excessive heat can result in a scorched flavour and/or a film of protein on the top of the milk. You can avoid these problems in one of two ways:
- The double-boiler method: Place milk in the top of a double boiler or in a heat-proof bowl set over a saucepan of simmering water. Heat just until bubbles form around the edge and steam begins to rise from the milk. Stirring frequently will prevent a film layer from forming.
- The microwave method: Pour milk into a microwave-safe container and microwave on medium-high (70%) power, stirring every 15 seconds, just until steam begins to rise from the milk. To scald milk for custards or yogurt, heat 250 mL (1 cup) on HIGH for 2 to 2 1/2 minutes.
Tip: Room-temperature milk is better in recipes than cold milk, so use the microwave to take the chill off milk that is fresh from the refrigerator. Microwave 250 mL (1 cup) for 40 to 45 seconds* on high (100%). Note: Times are based on a 700-watt microwave oven. Adjust cooking times to suit your oven.
How to shred cheese
Packages of grated cheese are very practical, but if you do it yourself you can choose the thickness of the shredding. Plus, you can create your own mixes. For best results, make sure the cheese is well chilled before shredding. Leftovers will keep in the fridge for about eight days in an airtight container. You can also freeze them if you use a freezer bag and squeeze out as much air as possible.
How to whip cream
It’s important to start with the right cream - Whipping cream - which contains about 35% milk fat. Light (5%), Half-and-Half or Blend cream (10%) and Table or Coffee cream (15%) do not have a high enough fat content to be whipped.
- For perfect whipped cream every time: Use a bowl just wide enough for the beater. Chill the bowl and the beaters before adding the cream. Whip only 1 cup (250 mL) at a time.
For more tips on how to whip cream, check out our Cream Tips & Tricks section.

share this article